LifeFlix v4.2.5 will store your captures in
“Macintosh HD > Users > “your operating system profile name” > Movies > LifeFlix > v4.0 > media” by default.
- Other than your imported captures being stored in your local drive, you may also export any scene or tape from LifeFlix.
Please follow the steps below to begin exporting your tapes:
- Click the export icon while an album or scene is selected. Exporting an album will process a bulk export of all the scenes that exist in that album.
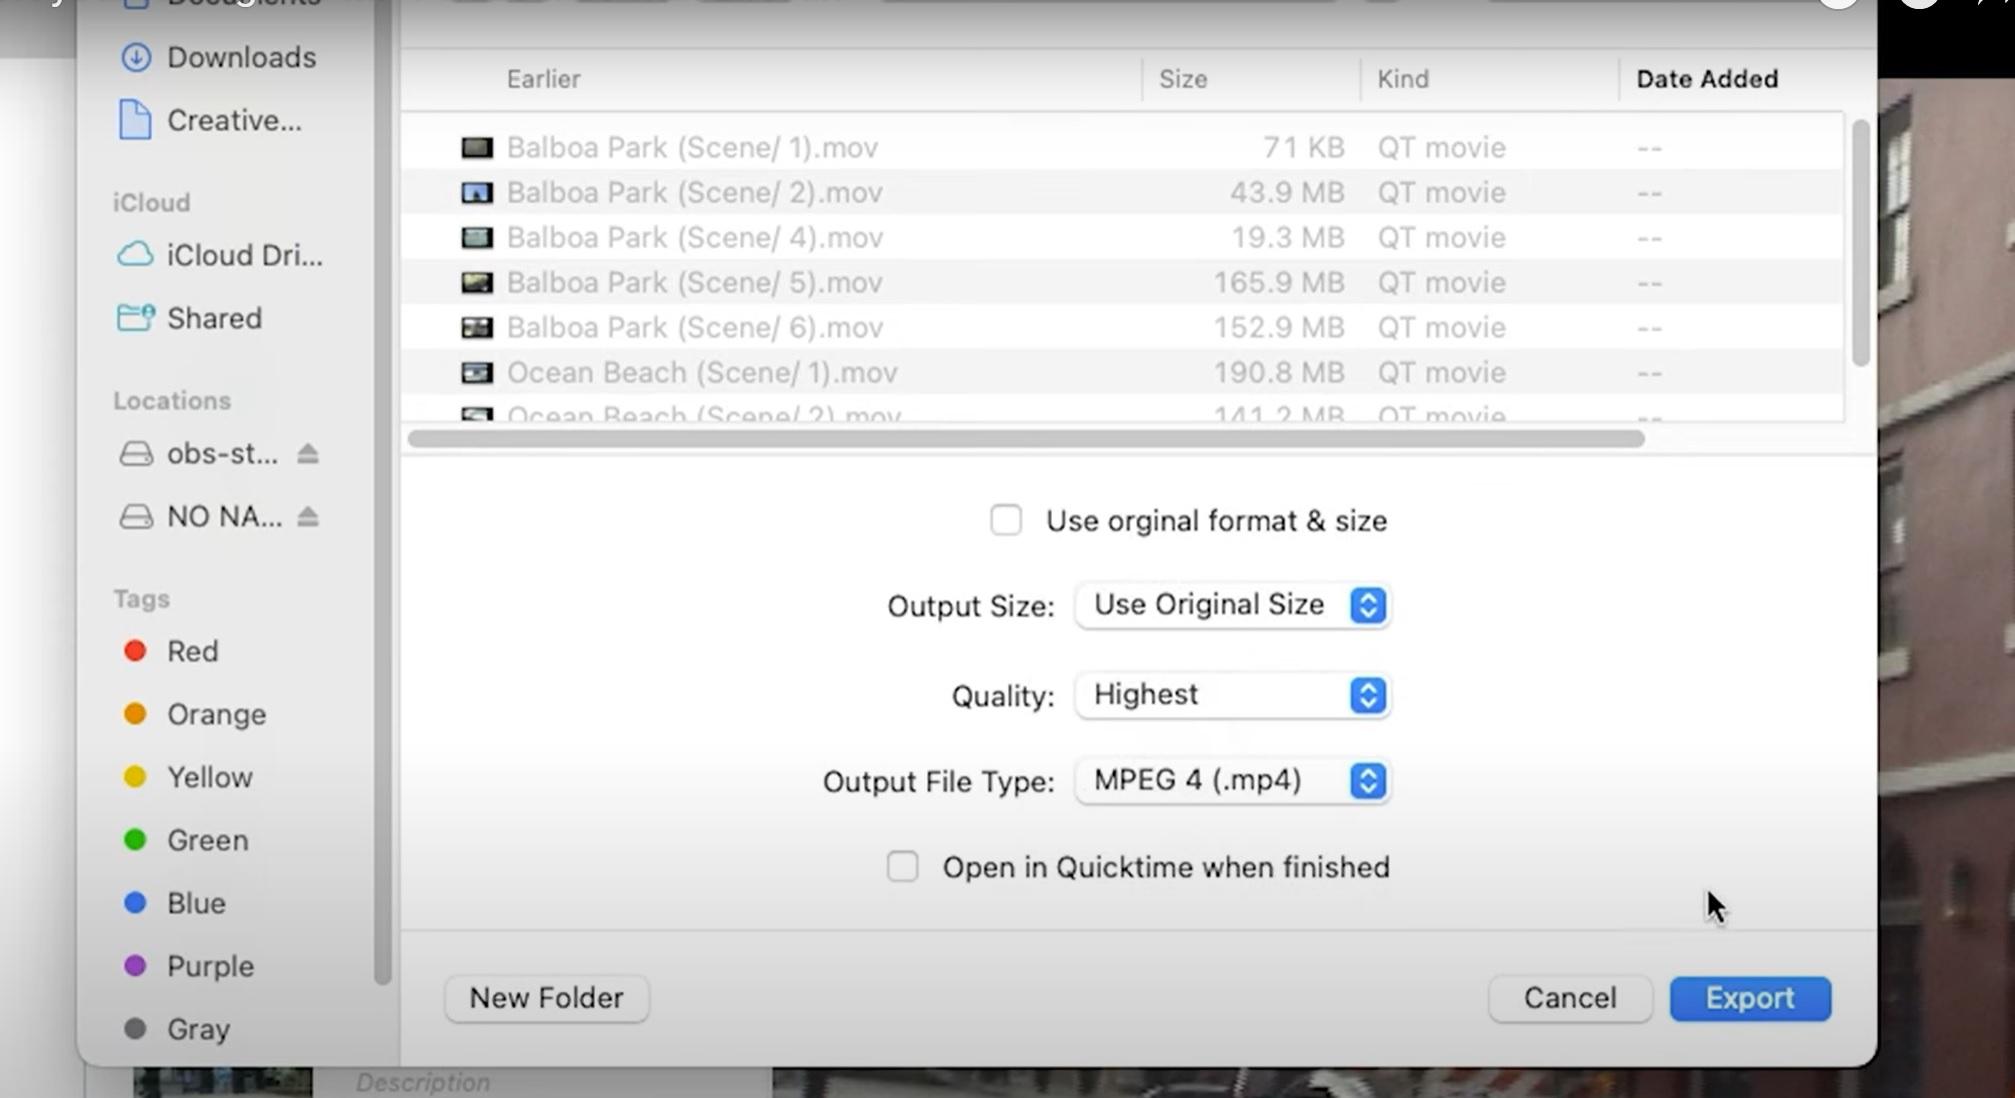
- Use “Save As:” to give your export a custom name, otherwise it will default to the naming schema of your Album name and scene number.
- Use the dropdown and the Finder view to select a destination for your export.
- Check “Use original format & size” if you wish to preserve your footage’s native video format, otherwise use “Output size”, “Quality”, and “Output File Type” to customize how your footage will be exported.
- “Output size” allows you to set your export’s resolution to 640 by 360, 1280 by 720, 1920 by 1080, and 3840 by 2160.
- “Quality Size” is used to set the visual fidelity of your export from lowest, medium and highest. The lower the quality, the smaller the file size will be.
- “Output File Type” determines whether to export as an MOV or MP4.
5. Select “Export” to export your footage to your selected destination.
- You can see a progress bar of your current export from the main interface. You will not be able to begin a new export until your current export has completed.
Important! Your video export will contain black bars for any resolution that does not have a matching aspect ratio to the original format.
Most Popular
Join Our LifeFlix Community
Enter Your Email Address to Sign Up for Exclusive Updates!
Own your
memories
forever
withLifeFlix!
Related Guides
How to Upgrade from the Free Version to a Paid Subscription
Before purchasing, download and test the free trial to ensure LifeFlix works with your device. The trial allows you to:
Read More ➜
Using LifeFlix on Older macOS Versions
Use LifeFlix on older macOS versions with these downloads and activation steps.
Read More ➜